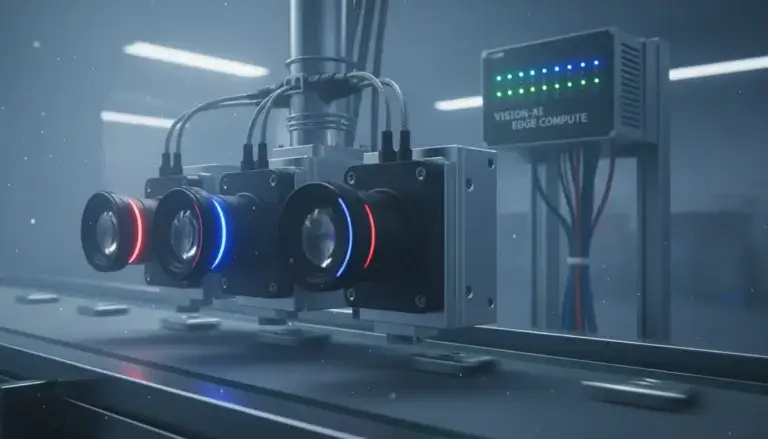
9 Development Tips to Get Your Proof of Concept to Market
It’s a common error to underestimate the difference between a Proof of Concept (PoC) design and a production-ready device. Here, we discuss in detail the difference between the two, while outlining how to go from one to the other.
What is the purpose of a Proof of Concept?
Proof of Concept is designed to prove that an idea, or concept, actually works. This might be to raise funds for the project, either internally or externally. Perhaps a rough hardware model of the product is a prerequisite for the software development. Fundamentally, a Proof of Concept is designed to prove that the device or product is sellable, and that it carries out the required function.
Ultimately, it is to eliminate any big risk factors.
These can commonly be found on crowdfunding platforms – Kickstarter, for example. But, in reality (long before Kickstarter) Proofs of Concept were used within businesses – ostensibly, to get buy-in within a company and to go ahead with the investment required for production.
It’s a common error to underestimate the difference between that and a production-ready device.
At the risk of stating the obvious, a Proof of Concept isn’t optimised. And there are several optimisations essential for taking a PoC successfully to production:
Optimisations to Consider Before Taking your PoC to Production
- Cost optimisation – it might be far too expensive to meet market need.
- Physical shape and size – The Proof of Concept might just be put together from off the shelf bits of hardware.
- Constraints and certification – It might not meet EMC standards, temperature or other environmental constraints.
- Completion – The PoC is very unlikely to have all the features required
- Reliability – Software bugs need removing, and the system needs fully testing.
Essentially, there’s a significant amount of work to do in order to go from Proof of Concept through to production. This is particularly true if the end product is intended to be high-volume, due to the degree of testing and optimisation required for these products.
As a rule of thumb, testing and optimisation requirements grow as targeted production volumes grow making the gap between PoC and production stages even bigger.
We’ve outlined the differences between a Proof of Concept and production-ready product. Now, here are the steps required to take a PoC to market.
9 Steps to Development Success
First, there are three basic streams in the realms of electronic product development that run in parallel:
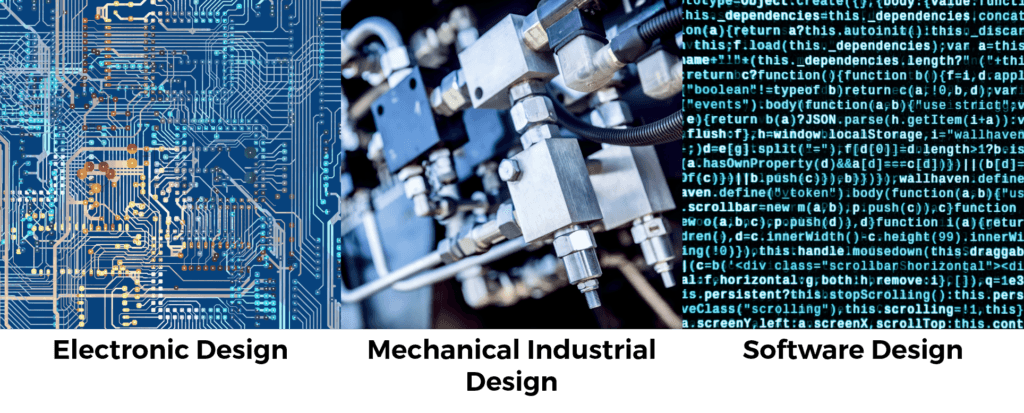
These three development streams flow into each other during the course of an electronic product design project. However, they could also run in parallel. This article will focus on the electronics design aspects – though, of course, the other two streams are normally required to run alongside this.
Software development is such a large section by itself that, here, we will assume that this product requires software within the device. Beyond that, the quantity of software could vary enormously – from being very simple microcontroller code to being a full-blown application running on Android and having to port Android to the product, etc.
Step 1: Schematic Design
After successfully Proving the Concept; demonstrating it does what it is supposed to do and any differences needed for the production of your final product have been identified.
The first step – on the electronics stream – is a schematic design. In other words, using a CAD package to capture the electronic design of the product.
At this point, because you’re thinking about a real product, rather than a Proof of Concept, you’re going to be looking at the Bill of Materials (BOM) costs, any environmental factors that are required. Early on, you will also be thinking about how the products are going to be assembled and tested in production, in order to avoid having to do a lot of rework later to make it production-ready.
When you embark on your schematic design, one of the things also to bear in mind is that ultimately, it’s going to be compliance tested and you must design to ensure you meet the standards.
This is where defensive design is important. It’s worth going overboard on the ability to fit components to help with EMC testing (radiated and conducted emissions). Consequently, when you do your pre-compliance testing, your options are to fit, bypass or remove these depending on how it goes. If you don’t do that design-in at the start, it is very difficult when you get to compliance testing to fit in components such as inline chokes, capacitors and cans.
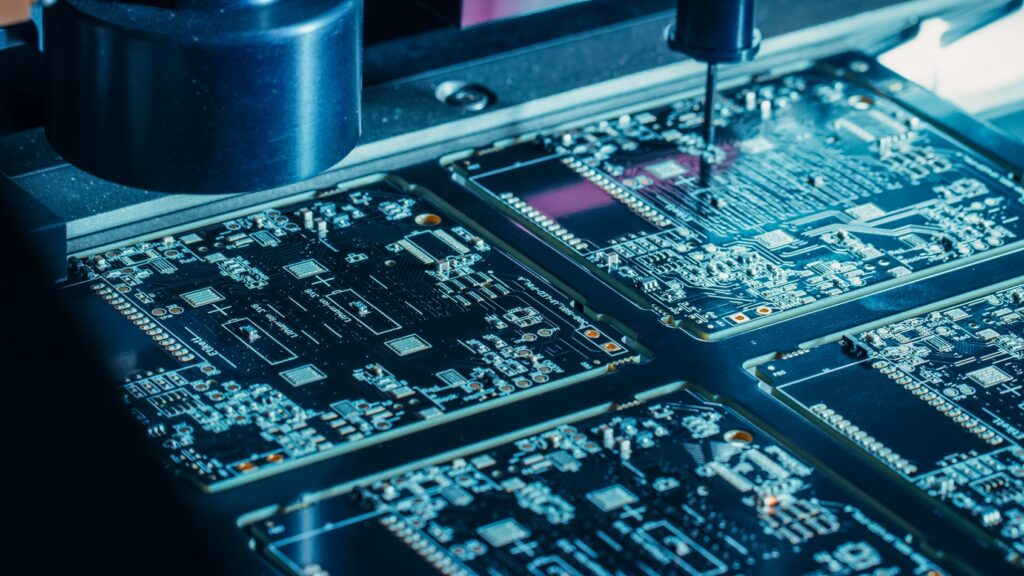
Step 2: PCB Layout & Component Placement
The first stage of PCB layout is determining the shape and size of the board – or boards – in the product. This requires you to have a concept industrial design and for the initial industrial design work to have been carried out to give you an outline shape for the PCB.
Going into the finished circuit board design, we assume you’ve got the mechanical layout from the industrial designer. Then, it’s a case of taking the schematic, creating a net list and going through the Printed Circuit Board design process. This involves designing components, doing the placement – which is where you place the components on the board – and then the tracking.
The placement will depend on several factors:
- The mechanical design – where connectors are placed for a display, keyboard, sensors, microphone etc.
- Analogue and digital partitioning for good performance
- EMC and radio aspects
- Commercials – cost of the PCB technology and size.
Step 3: Software
At this stage any software required on the board would usually have been started.
The most time efficient thing to do, in terms of reducing development costs, is to start the software once the target hardware is ready. You can develop code ahead of having hardware on off-the-shelf boards, but because it’s only a representative of the board (not the real thing) there are changes required to adapt to the target hardware after it arrives, which can be inefficient.

Write as much software as you can in parallel to the hardware design, ahead of getting hardware back. As well as saving time, this has the benefit that where there is inter-relation between software code and hardware, snags can be caught before the PCBs are made. ByteSnap certainly had occasions where the software team discovered issues with the potential hardware design in terms of, say, IO Pin Mapping, during this phase of working on development boards.
SnapUI – developing hardware and software concurrently
SnapUI is ByteSnap’s user interface development framework which accelerates the product development process as it allows for cross-platform integration.
Graphic User interfaces prototyped on Windows desktop can then be ported to low resource embedded devices whilst still maintaining high performance.
Of course, there are other frameworks for porting. However, if they’re not designed from the ground up to work on embedded devices, you may find that when you port it to a lightweight, embedded device, it’s unable to perform adequately.
Step 4: Prototypes
The prototyping stage is where you must begin to consider your manufacturing options. On the basis that you’re not doing your production in-house, the choices are either to use the partner intended to make the production product in volume, or go with a smaller specialist prototype house.
Benefits of a specialist prototype house:
For expediency, we generally use a specialist prototype house because they’re quick to quote and more geared up to making small numbers of prototypes rapidly.
We also find it more cost-effective and quicker to go down that route, rather than to go through the whole design for manufacture journey with a volume producer prone to having more gates and barriers at the outset.
In addition, production partners may not be geared to do any sort of hand assembly; everything has to go through robots, meaning components need to be supplied in production packaging such as reels and waffle trays.
Benefits of ultimate production partner:
The advantage of going with a potential production partner is that it gives them early access to the product and they’re able early on to flag issues with the design which will save you time later on.
If you are too late, they might say, “we can’t make this efficiently because you haven’t done X, Y and Z with the design…”
The decision is yours. Depending on your time scales and your budget, your production partners and your own preferences, you get a small number of prototypes made and test them.
Step 5: Testing Revision A
Time to test your boards and prototypes.
Before proceeding, develop a test plan. A good way of doing this is to write 3 lists:
- A list of your requirements (what do you want the device to be able to do?)
- A list of how you’ve met those requirements through the design process (validation) – before production you should check you’ve met all of these requirements.
- A list outlining how you’re going to test, which is validation and verification. “How am I actually testing that I did meet the requirements in this three-stage process?”
For the purposes of the article, we’ll go with the scenario that you have prototypes ready for testing.
Have a test plan and work up from the power supply, your clocks and oscillators and so on. Be aware that you’ll need software pretty early on (particularly if it has a microcontroller) to allow you to carry on testing the remaining hardware.
At this point your electronics engineer and your software team will work closely together to bring up and test the hardware.
It is essential that as much testing as possible takes place at this stage. Most projects these days are under tight time constraints and there’s a real push to move to the next stage to get the next revision of the board out. There’s a lot to be said, however, for really making the most of these revision A prototypes, because the more you can test at this revision, the lower the risk and cost, on the remaining stages.
Ideally, you’ll test every aspect of the system and the fit in a prototype case, even if it requires making some ugly modifications to the board. Ideally you will do EMC pre-compliance tests because failure of these can have a significant impact. Effectively, you get to the end of your testing and if the product basically meets your requirements, you should have a list of necessary modifications to make the product production-ready.
It’s rare to go with a revision A straight to production, except on very low volume products. Invariably, there are issues; with the mechanics, the electricals, EMC, or production. It could even be that you only want to add a single test point to the board. If the product is complex in any way, there is usually something.
This is an interesting point, because engineers can see it as being a badge of honour to get revision A’s into production and that can be a push to simulate everything into it. But all that work also takes development time and time down the line. And actually, is that more efficient than generating a product and getting on and testing it? Most of the time, we would say no, you need to swallow your pride in development, do what’s efficient and produce prototypes.
Step 6: Revision B
In an ideal world, Revision B would be suitable for production. At this point, it’s also worth engaging your final production partner and checking it’s going to meet the test requirements they have if you haven’t already gone through this before in revision A.
It’s fairly infrequent nowadays to have 100% test point access on boards, because it compromises the printed circuit board layout too much and is costly. However, the production house will typically want multiple test points and an ability to attach a test jig to it.
It’s a good opportunity for your final partner, even if they don’t make revision B’s, to have access to the board to come back with any comments on things they want changing for production.
Normally, you’ll be making five to 10 revision prototypes, but this is dependent on the cost of the product and the complexity.
It typically takes about a month to do a production spin for prototypes. Finding the delicate balance between over-caution, and rushing headlong into the first spin is difficult, and you will have to be pragmatic. Sometimes, simulation is imperfect and is merely an approximation of reality. It’s important that there’s a real balance being struck.
We’ve had customers where they’ve been very happy to partially test a product and go for revision B before partly testing it some more and making some efficiencies. In doing this, they’ve taken a pragmatic route of, “we need to keep this moving and so we want to just keep producing prototypes”. And they’ve just created multiple batches of small numbers, and kept testing the design rather than doing huge testing.
Step 7: Revision C Onwards
Generally, revision A knocks out all your major bugs and is pretty much there.
Revision B is usually ready for some early pilot runs. You might take 1500 off if you need to, but there’s usually another revision for production optimisation: Revision C.
At this stage the product might need very minor changes. It might only be once you start manufacturing, say 1500 off. At this point you might say want to move something or change a part/component size.
Consider Obsolescence and End of Life
Another issue is obsolescence of components. Availability of components is absolutely key to success and longevity in electronic product development.
Component availability is cyclical. Occasionally, we’ve done projects where between the inception of the design and getting to the point of manufacturing prototypes, we found that one of the components is obsolete. It could be something trivial such as a small connector, it could be a capacitor, but it could be a more key component. It’s usually one of the minor components because you are likely to have fully researched the major components at the outset.
Indeed, a component might be End of Life (EoL) or it’s just that there’s no availability in the market, and it’s a six months lead time. It’s very common to have to do re-working of some components because of those sorts of availability issues. And that’s often late on; not at revision A stage, where you can buy things from a catalogue in small quantities.
Quite often, it’s at a revision B or even C stage where you’re ready to go to production and then can’t get hold of a minor component. As a result, you need a small tweak to the circuit board for it.
The Purpose of Each Revision (typically):
- Revision A – should be functionally working but might need some mod wires on it. It should be mostly mechanically fitting – preferably completely but quite often there’s a minor snag somewhere, e.g., with the case for the board (for prototypes, they’re not Proofs of Concept). It should be basically fit for purpose and all the cost optimisations should have been done as part of this first stage.
- Revision B – all the wire mods should have disappeared. Your mechanical issues have been resolved. It may be ready for production for low complexity designs, but might need some optimisations relating to production or for compliance. This is where you do full compliance EMC testing and, at that point, that might throw up something your pre- compliance didn’t reveal. Full compliance is a multiple-day test where absolutely everything is checked and, unfortunately, sometimes it can uncover issues that weren’t spotted in a pre-compliance test on revision A.
- Revision C – is about production-ready boards (from C onwards). Hopefully, any final EMC issues have been taken out. Full production testing is allowed. Any hard-to-source components may have been replaced by others involving minor changes. Theoretically, revision C is a courtesy, as the device should be ready for pre-production. But, sometimes, you might need another revision and further revision; it just depends on the design and what happens outside of the electronics itself.
Step 8: Pre-Production Run (High Volume Products)
Pre-production runs are for high volume products. Avoid large increases in volume as it is too risky. Ideally, in a pre-production run around 100 might be produced.
For some clients, they have beta customers who will be willing to take these. These products might have been tested mostly in offices at the prototype stage. However, the real environment for the product could be in factories, vehicles or on top of mountains.
This pre-production run is where you would carry out field testing. You produce enough boards to start doing statistical field testing and work with beta customers.

It’s important here to get feedback for how the product actually performs in its target environment, rather than just on somebody’s desk. Invariably, this brings up issues such as software bugs, maybe some hardware bugs if you’re unlucky. And that all gets fed back into any further iterations of the design.
Step 9: Production
Assuming your beta testing goes fine, you’ll be then into production. A key differential between prototype and production manufacturing is that once you enter production, you’re then focussed on minimising the cost of production. Prototype manufacturers are more about speed than unit cost.
For production to get the costs down, that really is heavily linked to lead times and components. If you can order printed circuit boards and choose the long timescales on your components, it gives you much more leverage in reducing your production cost.
Of course, that takes time; you need to build that time into your plan for actually getting the product made.
Marketing
Your marketing launches, show launches and other promotions are typically done with those pre-production, type one products – rather than your later iterations. They could even be done with your Rev Bs if the cases are similar enough to your final design.

When to ramp up production
In an ideal world with no time constraints, you would go through a whole pilot study for as long as possible. For a 10,000 per year product, you’d want to produce 100 and then run for a number of months in various environments and get feedback.
However, in reality, many of our customers are under too much time pressure to be able to wait. Often, they’ll actually be ordering all the components and unfinished circuit boards in parallel with that pilot study; hoping that enough testing has been done prior to that, to mitigate the risk of having to throw the design away.
Generally, at this stage, you wouldn’t expect to find something that would affect most of those components on the board anyway, so it’s fairly safe to proceed with volume ordering. This is assuming all other things being equal around the commercial side. Even if you find a hardware bug, the likelihood is that 99% of your components will remain the same. You can get on and order your volume amounts – and you can do that fairly early on.
The exception: printed circuit boards
Finding a hardware bug in a PCB can result in the entire order being rendered useless, which is an expensive problem.
Giving the order for making 1000 printed circuit boards is high risk.
You’ve certainly got to have some feedback from beta pilot study so that you’re confident the hardware is fine, even if there are software issues.
I’m happy to say that at ByteSnap, the majority of our customers go into production successfully.

Summary
- Proof of Concept differs from a marketable product in that it’s not optimised in any way, for cost and the environment, etc. The amounts of work to get from Proof of Concept through to production is usually quite significant.
- Proofs of Concept typically are 10 to 30% of the way through to get to production, they are not 50% or higher.
- There’s a sequential set of steps required to get from Proof of Concept to production; the steps we’ve outlined are very much typical of the production path (with some variety).
- Much of what you’re doing is trying to move risk to the front of the projects.
- In production, you’re trying to test as much as you can on revision A and putting in defensive design; this will enable you to get enough test access and make changes during EMC testing.
- It is important to progress the project at a good pace, as this will ensure there is time at the end of the project in case there are unexpected problems.
- There are different ways of choosing your production partner, with pros and cons to that.
- Do not worry about the number of revisions of the prototype you go through. Look at it from a cold, cost and time perspective; focus on doing what is efficient.
- Field testing is invaluable before ramping up production. This ensures that the product works as intended in its actual environment rather than on a desk.
Take the reading offline
Download the eBook: ‘9 Development Tips to Take Your Proof of Concept to Market’ and have all the information here available, wherever you are.
[/wp-content/uploads/2021/03/1614868968-800×651.png]

What are ByteSnap’s solutions and expertise?
Our team has been taking products to market for over 13 years, from idea to fruition.
Our experience covers multiple disciplines and market verticals, which positions us well to provide support for any embedded concept.
Contact us today: let our engineers be an extension of your in-house team and help accelerate your project to market.
Further reading
Cost of Development of an Electronic Design Project
Image credit for woman with breathing tube and oxygenator: GCE Medical. Read the case study.